- Home
- Build Your Own Boat
- Building a Wood Boat
Building a Wood Boat: Cutting and Fitting the Bulkheads
With Alacazam's hull shell now sheathed externally, the next stage of building a wood boat can begin. Some builders of wood-epoxy boats don't sheath inside the hull above the heeled waterline, choosing instead to varnish the cedar strip planking.
Whilst there's no doubt that this approach provides a very attractive and natural finish to the visible cabin sides, we decided on maximum structural integrity by fully sheathing the hull internally with bi-axial rovings up to the underside of the deck.
Several additional layers of epoxied woven glass rovings and heavy tape were added along the centreline, and yet more still where the keel would eventually be 'letter-boxed' through the hull and bonded to the floors.
There'll be no troublesome keel bolts to worry about in this boat.
Bulkhead Locations
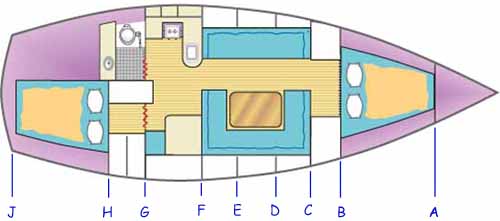 Locations of the structural bulkheads in Alacazam
Bulkhead A: This is a collision bulkhead in the bows of the boat forward of which is the anchor locker, below which is a watertight chamber.
Bulkhead B: This is a full bulkhead through which access is gained to the forecabin.
Bulkhead C: This is also a full bulkhead at the forward end of the saloon through which access is gained to the sail locker to port and cave lockers to starboard.
Bulkhead D: This is a double thickness partial bulkhead in the saloon providing support to the side decks and coachroof, and which carries the chainplates for the forward lower shrouds.
Bulkhead E: This is another beefed-up partial bulkhead, supporting the side decks and coachroof, spanned by a mahogany deck beam which carries the chainplates for the cap shrouds.
Bulkhead F: This is another beefed-up partial bulkhead at the forward end of the galley/navigation area, supporting the side decks and GRP cabin top and which carries the chainplates for the aft lower shrouds.
Bulkhead G: This is a full bulkhead at the companionway through which access is gained to the engine compartment, the heads to port and a hanging locker to starboard.
Bulkhead H: This too is a full bulkhead through which access is gained to the bosun's locker to port and the after-cabin to starboard
Bulkhead J: The transom, the top of which carries a mahogany beam to which the mainsheet track is bolted. A final small bulkhead right aft is a double-thickness collision bulkhead which forms the swim platform (see pic at bottom of this page) and carries the chainplate for the backstay and the runners.
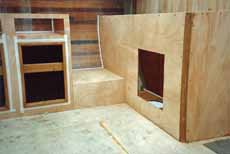
Building a wood boat using the wood-epoxy technique results in an extremely strong hull, as not only are the bulkheads fully bonded to the hull sides and the deck, every part of the internal structure - lockers, bunk berths, seats, galley units and the like are all fully bonded to the bulkheads and hull sides too. I'm a real fan of building a wood boat in this way.
Cutting and Installing the Ply Bulkheads
The bulkheads were cut from half-inch marine ply.
Their shape had been developed by the 'AutoCad' software design package which provided us with co-ordinates from which to draw them full size directly onto the 8 foot by 4 foot (2.44m x 1.22m) sheets of ply.
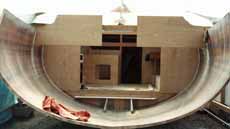
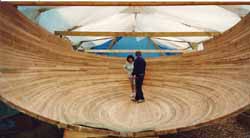 Would you care to dance?
At 12' 5" wide (3.9m) Alacazam's hull is fairly beamy, but not quite as cavernous as this picture suggests.
Nevertheless the standard size ply sheets weren't going to be large enough individually, so they were epoxy glued together with an 8:1 scarfed joint as necessary.
Those sections of the bulkheads that would eventually take chainplate loads or keel loads were doubled up in thickness. The bulkheads were cut with a small clearance such that high-strength epoxy filled could be forced through from one side to the other, eliminating the possibility of any hard spots between the hull and the bulkheads.
They were held in position until the epoxy had set by driving in panel pins along each side, which were covered by a fillet of structural filler along both sides of the joint.
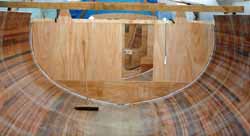 She's coming along nicely!
Finally the fillets were covered by epoxy-glass tape, forming a massively strong hull to bulkhead joint.
With all bulkheads complete (other than the transom, which was left out for as long as was practical to permit easy access into the hull), we were ready to start forming the other elements of the internal structure.
But before we move away from the bulkheads, here's a 'lesson learned'...
We should have cut limber holes (in inverted U-shapes) in the bulkheads before we glassed them in. We didn't, and consequently had to cut them out later with a hole saw.
This meant that the last inch or so of bilge water can't flow through to the keel sump where the automatic bilge pump can deal with it. Alacazam's a dry boat - we only get water in the bilge when we pull the thru-hull log impeller for de-barnacling, or bleeding the shaft seal, or I'm a bit careless when filling the water tanks.
But now we have to sponge out the bilges where this collects. No big deal, but irritating nonetheless.
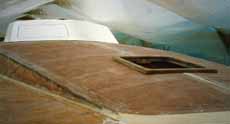
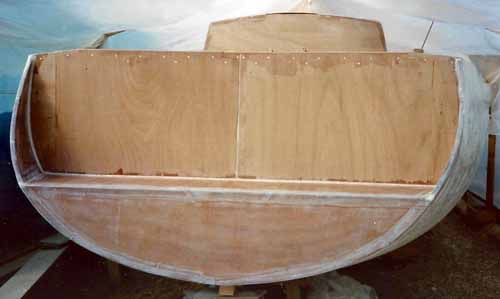 The hull is finally closed in with the completion of the transom
It was only after completing all the interior structure, the deck, coachroof and cabin top were we able to fit Alacazam's final bulkhead at the transom.
Next: Building a Wood Boat; the Interior Structure
Recent Articles
-
Which Type of Boat Fridge Is The Most Efficient?
Apr 24, 25 05:06 AM
The top opening boat fridge is reputed to be more efficient than the front opening type, but that may not be the case - and here, amongst other boat refrigeration considerations, is why -
Multihull Autopilot Selection is Not Straightforward
Apr 19, 25 01:25 PM
Whether its for a catamaran or a trimaran, tiller or wheel steered, a multi hull autopilot must be endowed with specific performance characteristics... -
Wheel-Steering Autopilots: Your Questions Answered...
Apr 18, 25 03:45 PM
Whatever your question, you should find the answer here
