- Home
- Buying a Used Sailboat
- True Cost of Boat Ownership
- Hauling Out
Hauling Out and Laying-Up Ashore
Unless you're lucky enough to keep your boat someplace where you can sail all year around, you're going to face the annual chore of hauling out and laying her up ashore for several months each year.
If your cruising ground is in the higher latitudes then you'll probably want to haul your boat out during the autumn to avoid the rigours of the winter weather.
In tropical regions it's not snow and ice you need to worry about; it's much worse - hurricanes, or depending on your location, cyclones or typhoons.
These malevolent monsters can occur during the summer and autumn months, so the prudent boater will looking to haul out in late spring.
Either way, your first concern will be in having your boat hauled out of the water safely and without damage, but there are a couple of things to attend to first...
Before Hauling Out...
Some things are best done before hauling out, while the boat's still afloat. For example...
1 - Getting the Sails Off
Now's the time to get the sails down, flaked and bagged - and it's much easier to do with the boat head to wind, which she may well not be when laid up ashore.
And it's never a good idea to leave furling headsails in place; they have a habit of unfurling in a blow.
2 - Changing the Engine Oil
Condensation will have collected on internal engine surfaces throughout the season and this is now contained within the oil. This can cause damage if left in the engine over the winter, so it should be changed along with the oil filters.
The oil should be warm and viscous or it won't drain properly, so now's the time to do it - just before hauling out.
On Hauling Out...
This always gets the pulse rate up and the sphincter muscle twitching - if you're the owner that is. Now, about those strops...
Positioning the Strops
Lifting strops can do a deal of damage to underwater parts during haul-out if they're incorrectly positioned. Particularly vulnerable are the rudder, the propeller and shaft, and the thru-hull log impeller.
I always place a length of blue masking tape on the hull sides to let the crane driver know where to put the strops.
Make sure the yard staff put some protection between the hull side and the strop - a sheet of cardboard is fine.
Beware of the Squeeze
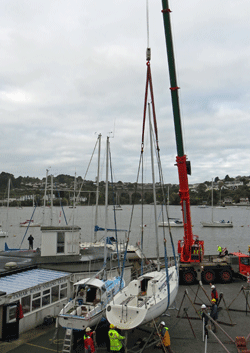 Extended length strops reduce the compressive loads on the hullsides
If a crane is used for the haul-out, the strops will be hung from a single hook which will impose a pinching load on the hull topsides.
The beamier the boat and the shorter the strops, the greater this load will be.
Stanchions, toe-rails and guard wires are at risk here - you may need to route the strops inside the guard wires to avoid damaging them, particularly for the stern strop.
Masthead instruments too are vulnerable.
There's no problem at all if the crane driver fits a spreader bar to open up the stern strop, but that means removing the back stay - a prospect which few owners relish, swept back spreaders or not.
Using a crane for hauling out is very much weather dependent. High Winds? Forget it!
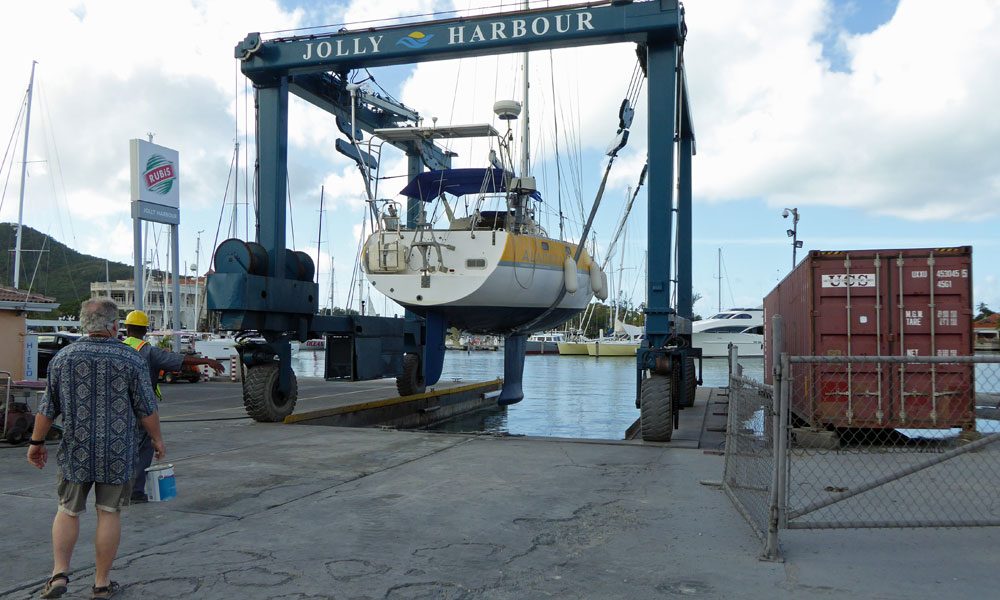 A travel hoist eliminates compressive loads altogether
Larger boatyards with a purpose-built dock will likely use a travel hoist instead of a crane.
The wider spread of the strops completely eliminates the crushing loads on the hull but means the boats can't be stacked as closely together - unless that is, they've got one of these...
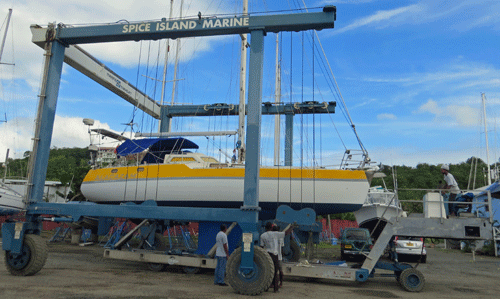 Transferring a boat from a travel hoist to a boat handling trolley
This is a boat handling trolley, which works in conjunction with a travel hoist.
Some are designed to be towed, but others - like this one at Spice Island Marine in Grenada - are motorised.
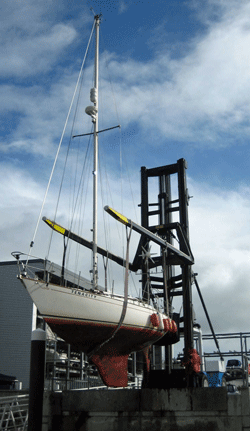 Another approach, using a purpose-build forklift
Another approach to hauling out is by forklift. These were originally developed for the dry storage of small powerboats in racks.
In this case the large rubberised forks are slid under the boat's flat chines which can be raised and lowered as required.
Sailboats can't be supported on the forks in this way, so they're dealt with by slinging in strops as shown above.
In the yard where this shot was taken - Yacht Haven Quay, Plymouth - they haul out sailboats with their Wiggins 'Marina Bull' Forklift, the largest of which can handle sailboats of up to 10,000lb and lift heights of up to 54 feet.
Breezy conditions raise no problems with a forklift, and the absence of a crane hook means there's no risk of damage to the masthead instruments.
Tripod Jackstands or a Boat Cradle?
If you're using tripod jackstands you'll need at least two either side of course - for my 38 footer I have four either side and one under the bow.
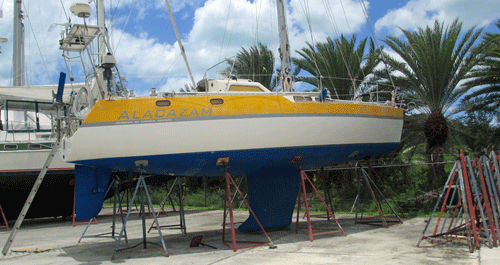 Tripod stands - a cradle is more secure
Unless you're on a concrete hardstanding, each leg of every tripod should be supported by a square of plywood or planking to prevent the foot of the tripod sinking into the ground during heavy rain.
Each tripod should be chained to its mate on the opposite side of the boat - better still instead of chains, use a network of welded rebar tie-rods to prevent the tripods moving.
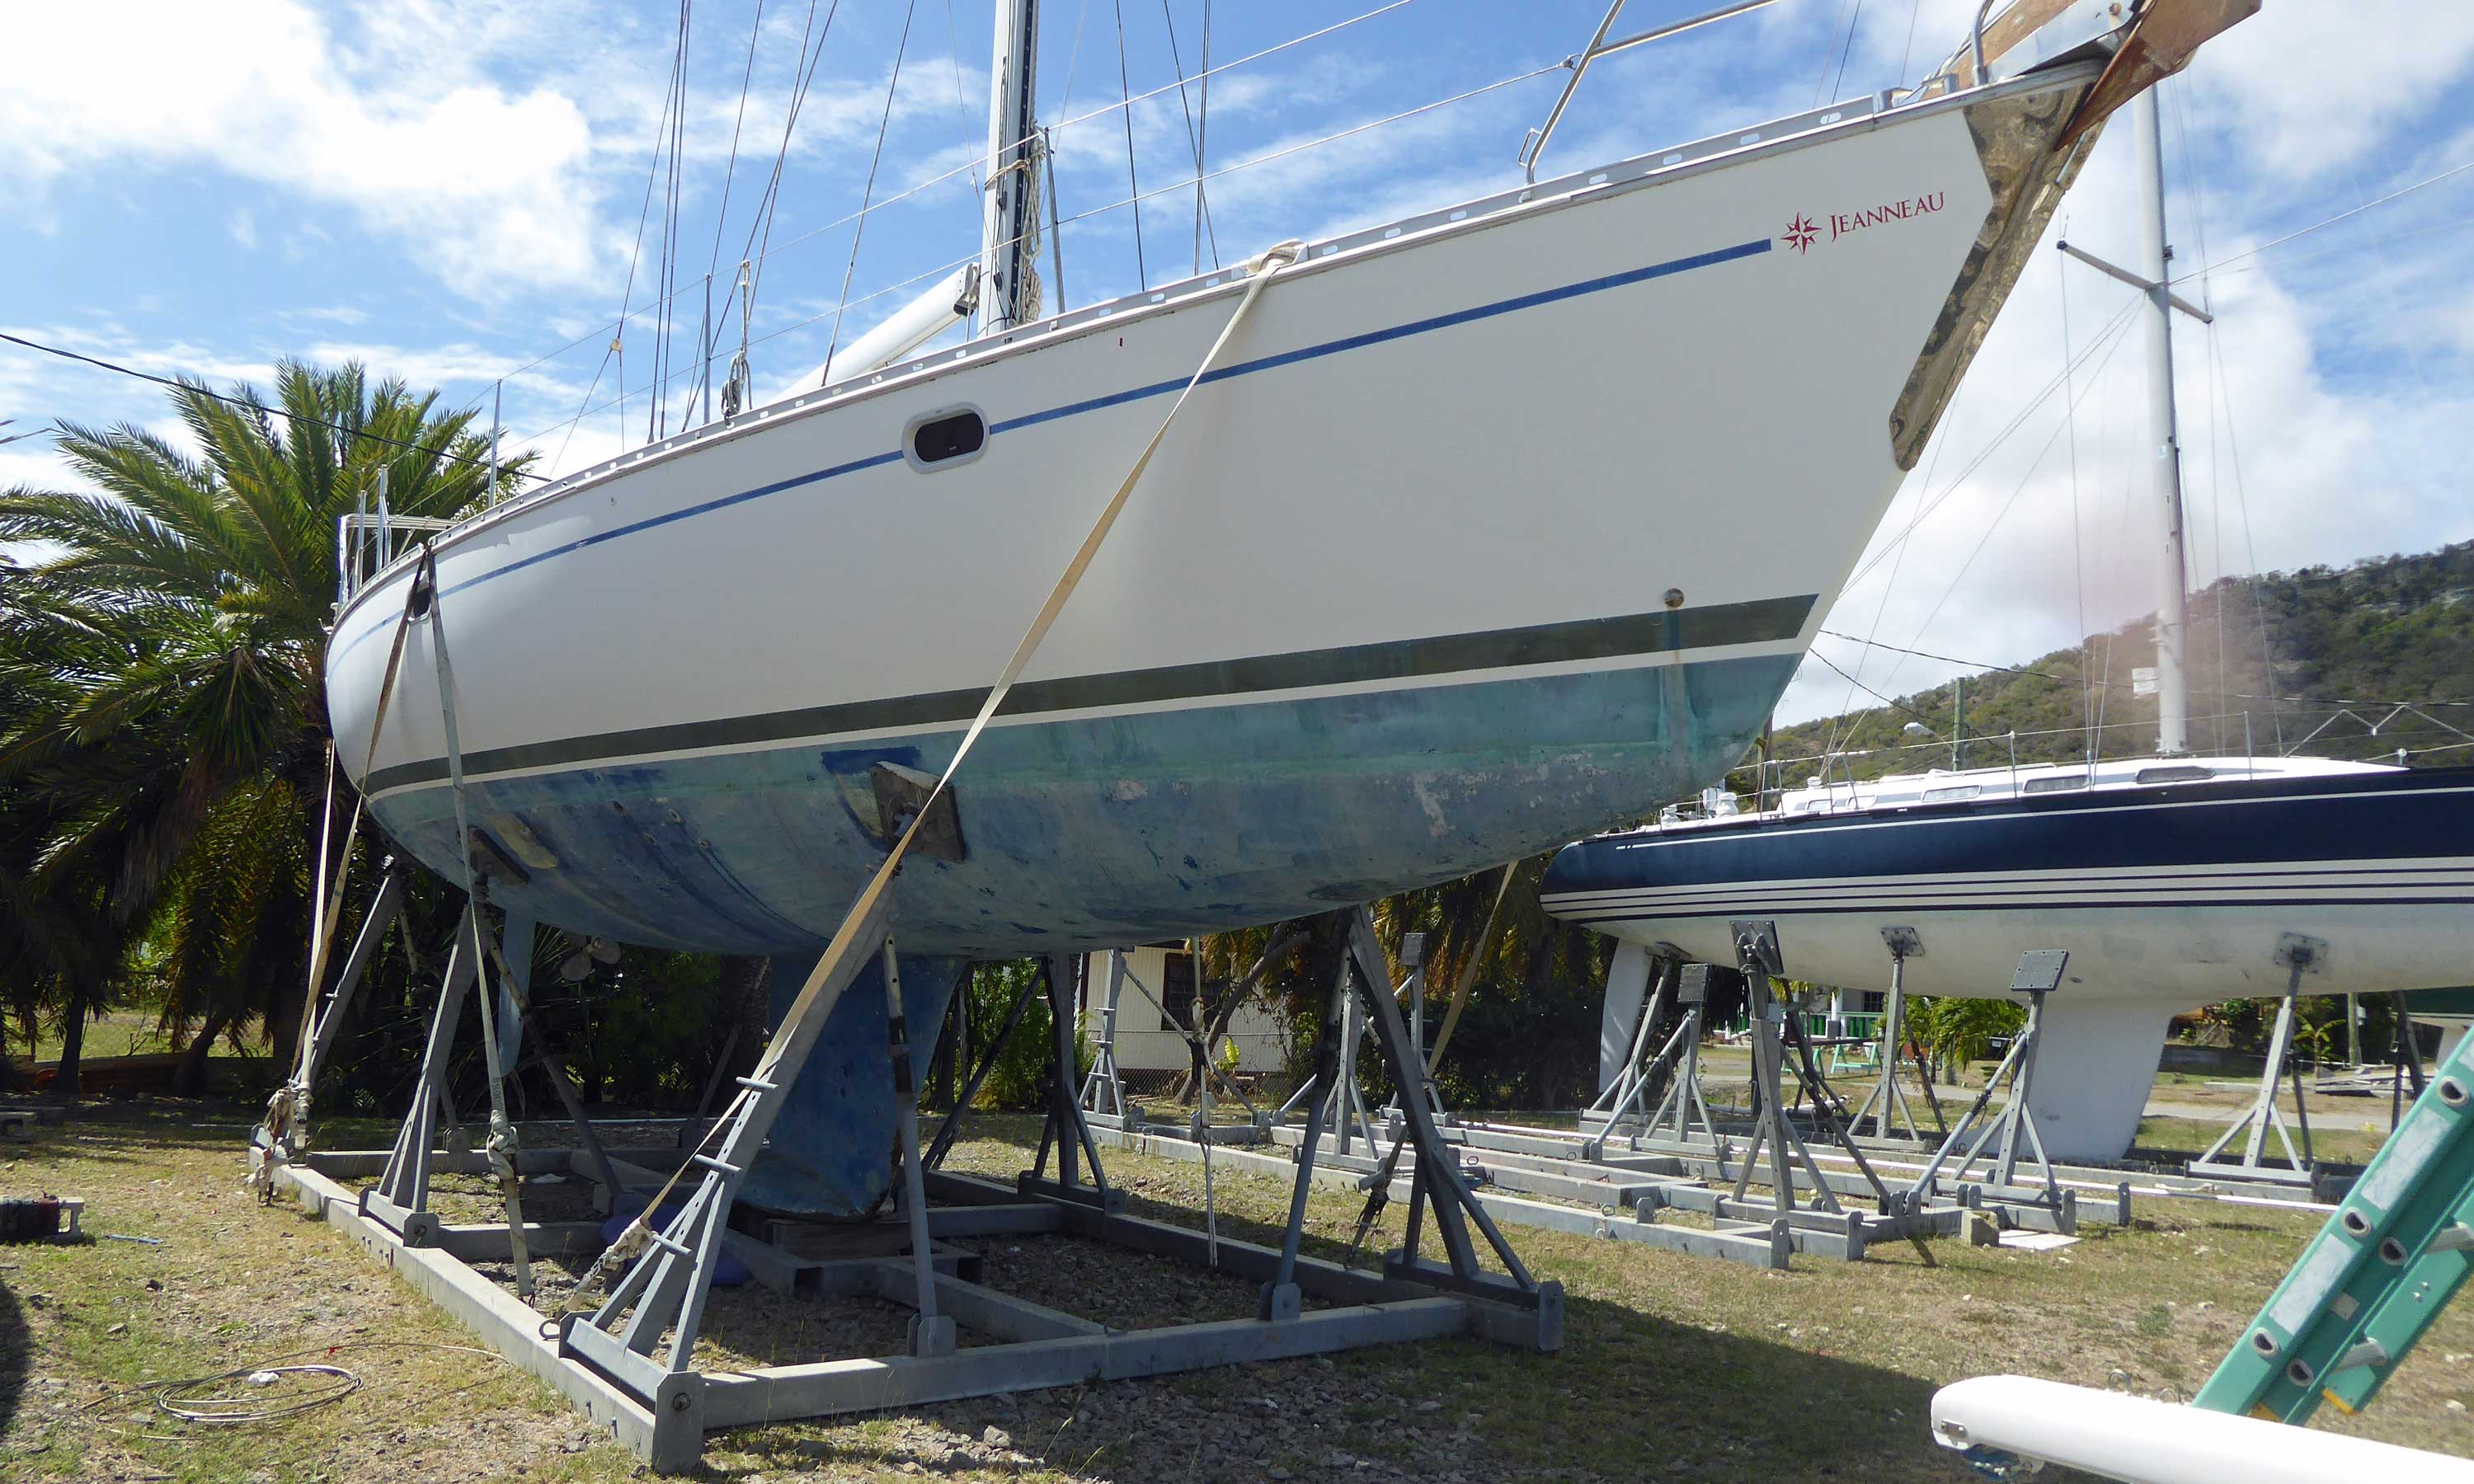 Ultimate security!
Make sure the boat is leveled up such that rainwater will escape through the cockpit drains. A spirit level will be useful here.
For ultimate boat security during the lay-up season, nothing beats a properly designed cradle, particularly if the boat is strapped down to ground anchors too...
Now the Real Work Starts...
If you keep your boat in the Caribbean, you really should take a look at
High wind, heavy rain, freezing winters and tropical summers will all conspire to play havoc with your pride and joy.
Inside the boat condensation, corrosion and mildew will be similarly at work.
Here's what you need to do to counteract their malevolent intent:~
Anchor & Chain
Drop the anchor and chain onto a clean surface (an old pallet is ideal), thoroughly rinse in fresh water and allow to dry. Similarly clean the anchor locker before re-stowing the anchor and chain. This is also a good opportunity to check the condition of the chain and galvanising.
Running Rigging
All running rigging including the mainsheet tackle, the kicker assembly, sheets, lazy jacks, sheets and other control lines should be removed and soaked in a mild detergent solution, then allowed to soak in fresh water before drying naturally.
Tie messenger lines to the ends of all your halyards, remove them and clean them as above.
If you choose not to remove your halyards, make sure they're tied off well clear of the mast, otherwise the constant slapping will damage the mast anodising.
Thru' Hull Fittings
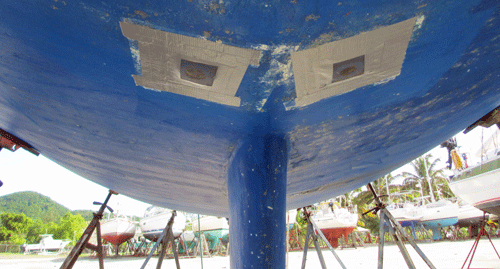 Curious insects should look elsewhere...
I like to remove my thru' hull log impeller and depth sounder transducer for two reasons:
- It improves ventilation;
- If rainwater does get below, it will drain out;
But if you're in an area where insects and other undesirable wildlife are a problem, then the apertures should be covered by a rot-proof mesh and stuck down with tape as shown here.
Seacocks
Who's not discovered a seacock that was operating flawlessly at the end of one season to be seized solid at the beginning of the next? Here's how to avoid that happening:
- Have one person inside the hull operating the seacock, and another outside armed with a can of non-petroleum based aerosol penetrating lubricant;
- When all seacocks have been dealt with in this way, go back to the first one and open and close it several times. Providing it operates freely, leave it closed and move on to the next one. For any that don't open and close easily, repeat the process until it does.
Fuel
What you definitely don't want in your fuel is 'cladisporium resinae' which is the correct term for the well known diesel bug that can cause havoc with our engines.
Here's how to prevent this malevolent fungal growth from taking up residence in your fuel:~
- Fill your fuel tank completely, so that there's little or no air space above the fuel in the tank. Why? Well, it's here that condensation would otherwise occur, and our little bug friend needs water to establish itself and multiply;
- Treat the fuel with a biocide designed to kill the little blighters if they've managed to get established despite your efforts.
Not sure if your fuel is contaminated? There are several diesel fuel bug detector kits on the market that will tell you one way or the other.
Exhaust Waterlock
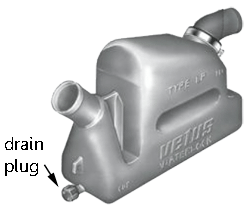 Don't forget to drain and disconnect the exhaust waterlock
These moulded plastic devices collect water that drains back from a wet exhaust system, preventing it from running back into the engine, and also reducing the noise in the exhaust system.
They're usually fitted with a drain plug for draining out any water before the winter lay-up. If you don't do this, you risk any contained water freezing and splitting the waterlock.
And you should also disconnect the engine-side hose. If you don't, particularly in hot climates, any remaining water in the waterlock will evaporate and the water vapour will find its way into the top end of the engine, causing havoc with the valves.
Masts & Spars
You might not want to remove the mast every year - particularly if the yard you're in has no mast storage racks - but doing so every four years or so for a close inspection and overhaul makes good sense.
As a minimum the aft end of the boom should be lashed down on deck, but it's better to remove it completely and lay it on the side-deck or coach-roof.
Cutless Bearing
Also known as Cutlass Bearings, these water lubricated devices are fitted inside the P-Bracket, supporting the shaft and maintaining its alignment with the gearbox. Check your shaft for movement within the bearing. If there's anything more than the slightest movement, you need to fit a new one.
Anodes
This is the time to check all sacrificial anodes. If they're significantly eroded they should be renewed. If they don't appear to be eroding much at all, it's not a cause for celebration - you need to find out why they're not doing what they're supposed to do, so check all connections and contact surfaces.
Incidentally, if your boat's propeller shaft is supported by a P-bracket it's always worth fitting a shaft anode ahead of it. Then, if your shaft coupling fails, your propshaft won't slide out through the hull leaving a hole that could sink you.
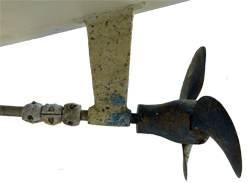 Too close?
Here, the owner has fitted three shaft anodes, but they're a little too close to the P-bracket.
Why? Well the cutless bearing requires a thru-flow of water to lubricate it, and in this arrangement the proximity of the anodes is diverting the water flow around it. Expect it to wear out soon.
So fit the shaft anode at least 3" (75mm) or so forward of the bearing, allowing the anode the lubrication it's entitled to, which will extend its life considerably.
Batteries, Windcharger & Solar Panels
You can either make sure your batteries are fully charged, then disconnect them to reduce current drain to a minimum, or leave the battery bank connected to a solar or wind-powered charging device.
One of the small vertical axis trickle charge wind generators is ideal for this, but their more muscular horizontal axis cousins may well overcharge the batteries or destroy themselves in a winter storm. In my view they're best tied up in such a way that the blades can't rotate but allows the whole thing to weathercock into the wind.
Solar panels too are excellent for keeping the batteries topped up during the winter lay-up, their charge being much reduced due to the low altitude of the sun and the short daylight hours.
But if you do choose to keep them charged in this way, you should also leave a low current electrical device switched on, as batteries like to 'work'. Not a GPS set though, because prolonged use may damage the screen - as I found out to my cost.
Watermaker
Read the makers instructions for details of how to prepare it for a long lay-up. Our Katadyne needs to be biocided (I may have created a new verb there) if it is to produce anything other than disappointment on next year's cruise.
The Gas System
Light all burners, then turn off the gas at the bottle remembering to turn the burners off when they go out.
Canvas
Remove all canvas covers - sprayhoods (that's 'dodgers' in US speak) dodgers (that's 'weather cloths' in the US), sailcovers, cockpit cushions etc - wash in warm soapy water, rinse and store until launch time.
Outboard Motor
Outboard motors, that whilst working perfectly at the end of one season, can steadfastly refuse to get up and go at the beginning of the next.
What you need is 'fogging' oil. Here's how to use it:~
- Fire up the outboard, making sure the cooling water intakes are fully submerged of course;
- turn off the fuel supply, leaving the engine running at idle;
- just before the engine dies, it will start to cough and splutter. At this point, spray fogging oil into the carburretor until it stops. You can ignore the smoke...
This will purge all the petrol (US, gas) from the fuel system, reducing the possibility of varnish forming as petrol evaporates, and will coat all internal engine parts and protect against corrosion.
A Hauling Out and Laying Up Checklist
We all have our own Hauling Out and Laying Up Checklist - here's ours...
Accessories
- Clean and bag dinghy;
- Remove BBQ;
- Remove Danbuoy and HS lifebuoy;
- Remove Life Sling;
- Lubricate locks;
- Remove all batteries from torches etc;
- Wash insect screens;
Domestics
- Clean watermaker filters;
- Pickle watermaker;
- Turn off gas at cooker and bottle;
- Turn off gas locker vent valve;
- Sort chart table contents;
- Flush toilet with fresh water;
Electrics
Fabrics and Interior
- Clean underside main hatch;
- Clean bilge;
- Clean carpets and cabin sole;
- Clean and close curtains;
- Clean upholstery;
Tanks
- Fill fuel tank;
- Drain and dry water tanks;
Hull, Deck and Cockpit
- Remove tiller;
- Check condition of anodes;
- Fit deck hatch covers;
- Remove thru-hulls and install insect mesh;
- Deck/Hull clean;
- Wash anchor, chain and locker;
- Clean stainless steel;
- Fit instrument covers;
Mechanical
- Tie up windcharger and turn off;
- Lay up outboard motor;
- Main engine oil/filter change;
- Grease shaft seal;
- Drain and disconnect exhaust box;
- Lubricate seacocks;
- Clean and grease prop;
Sails & Canvas
- Remove and wash bimini;
- Remove and wash dodgers (weathercloths);
- Remove/bag sails;
- Remove and wash sailcovers;
- Remove and wash sprayhood;
- Clean cockpit seats and cushions;
Spars and Rigging
- Remove jackstays;
- Remove mainsheet, vang, runners etc;
- Tie out halyards;
- Secure boom on deck;
Recent Articles
-
Is Marine SSB Still Used?
Apr 15, 25 02:05 PM
You'll find the answer to this and other marine SSB-related questions right here... -
Is An SSB Marine Radio Installation Worth Having on Your Sailboat?
Apr 14, 25 02:31 PM
SSB marine radio is expensive to buy and install, but remains the bluewater sailors' favourite means of long-range communication, and here's why -
Correct VHF Radio Procedure: Your Questions Answered
Apr 14, 25 08:37 AM
Got a question about correct VHF radio procedure? Odds are you'll find your answer here...


